With the arrival of Apple’s Live Translation feature for AirPods, users can now translate conversations using older models of the company’s earbuds. This feature is accessible without needing the latest AirPods.
- Apple’s Live Translation feature for AirPods is now ready for use.
- Live Translation only works on models with the H2 chip.
- You’ll need an iPhone that can run Apple Intelligence.
- Download both the language you’re speaking and the one the other person is speaking.
- Apple’s Live Translation feature is still in beta at this time.
Live Translation on AirPods only works on models with the H2 chip, including AirPods Pro 2 and AirPods Pro 3. An iPhone that can run Apple Intelligence is also required, specifically the iPhone 15 Pro, Pro Max, or any member of the iPhone 16 or iPhone 17 lineups.
To use Live Translation, ensure Apple Intelligence is enabled in the Settings app on your iPhone and that Apple’s Translate app is installed. Your AirPods should also be on the latest firmware, which can be checked in the AirPods settings menu on your iPhone.
Hardware requirements
Live Translation on AirPods only works on models with the H2 chip. This includes the AirPods Pro 2 and AirPods Pro 3. You’ll also need an iPhone that can run Apple Intelligence, which is the iPhone 15 Pro, Pro Max or any member of the iPhone 16 or iPhone 17 lineups.
Step 1: Download languages for Live Translation
The first step towards using Live Translation is to download the languages you’ll need. You’ll need to download both the language you’re speaking and the one the other person is speaking. For example, if you’re translating Spanish to English, you’ll need to download both the Spanish and English language packs.
How to complete the download process:
- Put your AirPods in your ears and make sure they’re connected to your iPhone.
- Go to the Settings app and tap the name of your AirPods on the main menu.
- Under the Translation section, tap Languages and then select the ones you want to download by tapping the download icon.
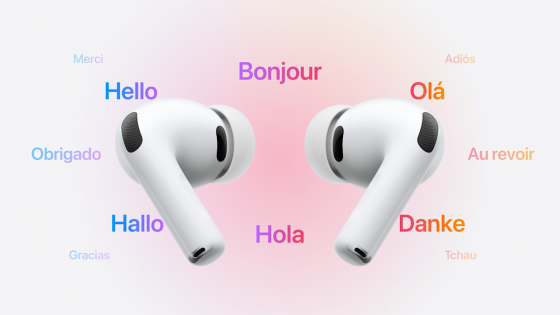
- This screen will show what languages you’ve downloaded and which ones are available. At launch, Live Translation works with English, French, German, Portuguese and Spanish.
Step 2: Set up a conversation
After you’ve downloaded the languages you need, you’ll have to set up a Live Translation conversation before you can start talking. This tells the Translate app which language to listen for and which one to translate it to.
To set up a Live Translation conversation you need to:
- Put your AirPods in your ears and make sure they’re connected to your iPhone.
- Double check to make sure Apple Intelligence is turned on.
- Go to the Translate app and tap “Live” on the menu along the bottom.
- Select the language the other person is speaking.
- Select the language you want your AirPods to translate to.
Step 3: Use Live Translation
After you’ve completed all of those set-up steps, you’re ready for a Live Translation session. There are several ways to activate the feature when it’s ready to use.
All the ways you can start Live Translation:
- Go to the Translate app, select Live from the menu and then tap Start Translation.
- Set the Action button on your iPhone to automatically start Live Translation when you’re wearing your AirPods.
- Press and hold the stems on both AirPods at the same time.
- Ask Siri by saying “Siri, start Live Translation.”
- Open Control Center by swiping down from the top right corner of your screen, then tap Translate.
How to use Live Translation in a conversation:
- After you’ve done one of the five options above, your session will begin. If you don’t open the Translate app, you’ll see a notification and a Live Translation icon will remain in the Dynamic Island.
- Listen to the other person speaking. AirPods will translate what the person says to your selected language.
- In very noisy settings, you can use your iPhone’s microphones in addition to AirPods to enhance performance.
- Say your response as you would during a normal conversation.
- Use the Live tab in the Translate app to show a transcript on your iPhone to the person you’re speaking with.
- The person you’re speaking with can also use AirPods to hear your translated responses.
- To stop Live Translation, tap the X button in the Translate app.
A word of caution
Apple’s Live Translation feature is still in beta at this time. The company warns that the results may be “inaccurate, unexpected or offensive.” You’ll want to double check any important information for accuracy.
Originally reported by www.engadget.com as “How to use Live Translation with AirPods” on 2025-09-24 18:48:00.